With WebAssembly we can write a library in almost any language, compile it to WebAssembly (WASM) and use it from JavaScript.
In this tutorial I will show you how to get started with TinyGo by writing a simple add() method in Go and using it from a web page. All the code will be running in the browser without any backend process involved (you only need a static server to serve the html page and JavaScript files, but I will cover this part too).
Install TinyGo
To be able to install TinyGo you need to have Go installed first. I have personally tested this on my Mac, so I will provide instructions for MacOS, but you can find instructions for the other operating systems directly on the project website: https://tinygo.org/getting-started
You can install TinyGo on MacOS using brew:
|
|
If installation is successful, you should be able to run this:
|
|
Implement an add() method in Go
Create a new empty project/repository using your favourite IDE (I personally used VSCode, but of course you can use anything else) and then create main.go file with this code:
|
|
Compile to WebAssembly (WASM)
To compile the above code to WebAssembly you need to run this command:
|
|
that will create a file named wasm.wasm in the same directory of your project. This is the compiled web binary that will be loaded later by JavaScript.
Add required WASM library
There is a file that is provided with TinyGo that you need to distribute with your application: wasm_exec.js. To include it in your project, you need to run this:
|
|
Script to load the WebAssembly
At this point you will need an additional JavaScript file that will take care of loading the WebAssembly code. This file is not “standard” and may be different for every project, but the essential commands will be very similar.
Create a new file named wasm.js with this code and save it in the root of your project along with the other files:
|
|
HTML page to collect input and show result
We create a simple HTML page that will display two input boxes and a third one to show the result. Create a new file named index.html in the root of your project:
|
|
Please note: frontend development is really not my daily bread. I’m sure the above code can be written in a better way, but I can assure you that at least it works.
Serving the static files
The project itself would be complete, but you need something able to serve static pages and set a couple of required headers. We can implement one with a few lines of Go. Create a new file named server.go:
|
|
Testing the project
The project is now complete and can be tested. There are at least two methods to check if everything works: using the webpage we just created and calling the method from the JavaScript console.
To test the application using the web page, run the server from the command line:
|
|
Open a web browser and visit the address http://localhost:8080
You should see something like this:
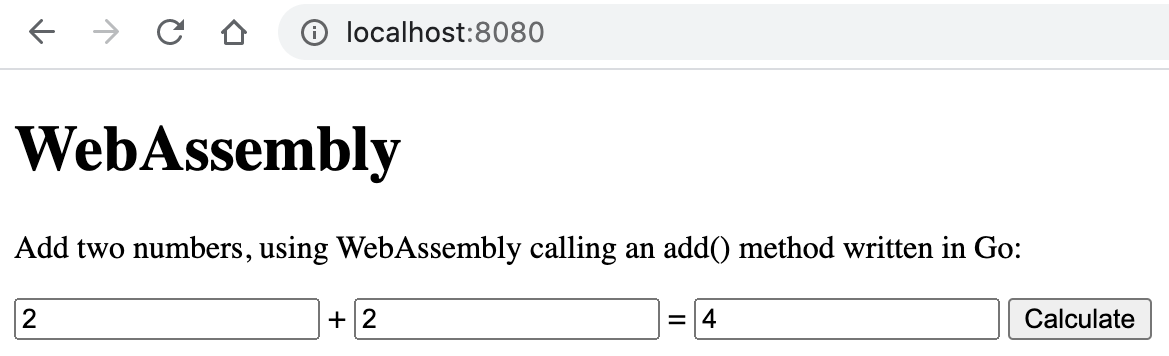 {width=60%}
Once the page is loaded you can also open the JavaScript console (it’s in you browser developers tools and at least Chrome and Firefox have one) and call the method directly:
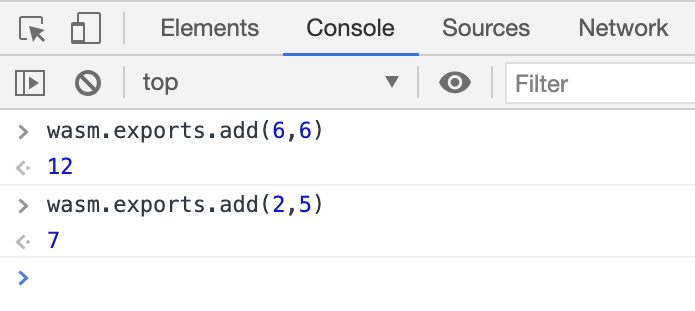 {width=60%}
Conclusion
If you want to learn more about TinyGo I suggest you to visit the project website https://tinygo.org while more technical information and details about WebAssembly can be found here https://webassembly.org
You can find the complete source code of this project on GitHub: https://github.com/andreagrandi/tinygo-adder
Credits
I want to thank my colleague Ross Jones for introducing me to WASM and for the help given.